home

Sunday 18 March 2018

Stages of the Moon

The challenge of 13arts is


Travel the World- I took it to the next level Travel the universe.
I have been wanting to make a galaxy painting so here it is.


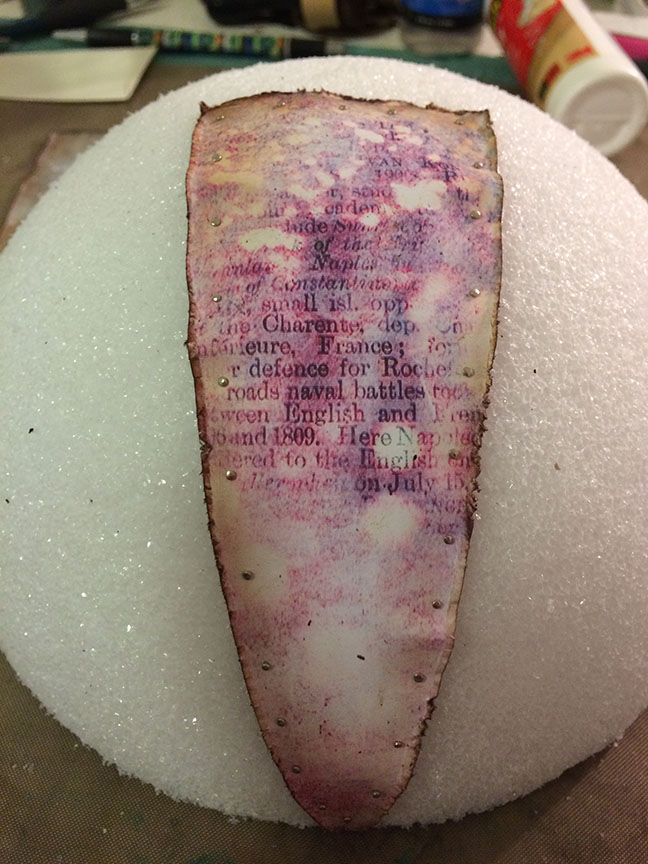
Start with styrofoam balls cut in half for the full moon.  I cut the other half balls into 3/4 moon, 1/2 moon, and 1/4 moon.  Smear on sand texture paste.


While the texture paste was still wet i press the moon into art stones- mega, regular, and mini.  Set aside to dry.

Paint with Alchemy opal magic yellow blue paint.  Dry.  Water down Alchemy Metallique emerald green paint, dab into graters then spray with water, the color with spread into nooks and crannies.  Dry


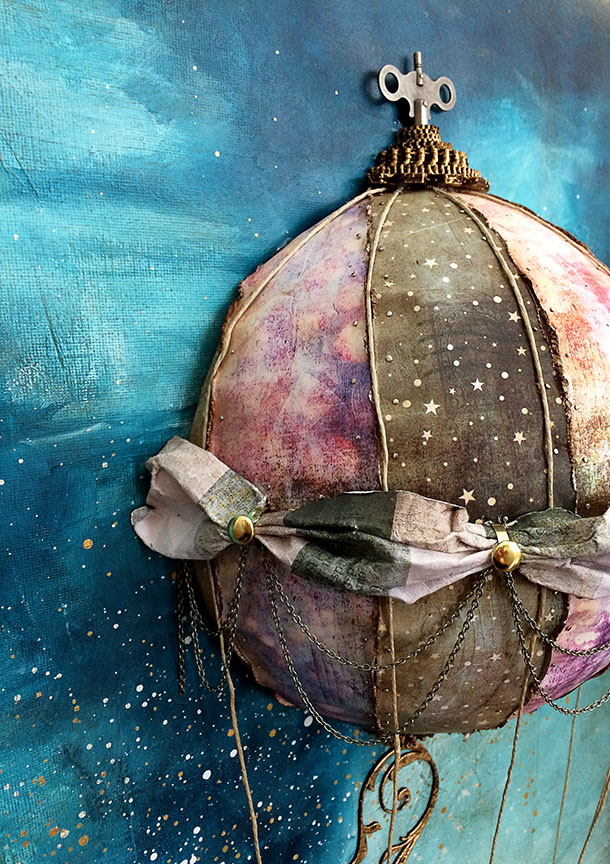
So many many layers later here is the moon.  Once teal has dried rub with a little white gesso in random spots.  Next rub in gold wax, here I used a paintbrush so i could get into smaller areas.  Next water down black acrylic paint and dab into nooks and crannies, spray with water.  Finally finish with a little white gesso dabbed on with fingertips.
Whew done.


I used a 14"x11" canvas then smeared with sand texture paste.  Added some stars made with a mold and polymer clay- I over cooked that is why they are brown.  Around stars add mini and regular art stones.  I tried to create a swirl pattern.


Close up of star bundle.


Once dry paint entire canvas with black gesso.  Now all that texture pops.


Start painting with alchemy metallique paints, Midnight Sky, Deep Waters, Mermaid Teal, Crocus Fields.  Start by spraying canvas with water- a water spray bottle this is my most used tool for mixed media.  Again paint in swirl pattern.


Paint on corus fields paint, spray with more water then brush out color to dilute and smear color edges.

Blot off the excess paint around edges, now the color is concentrated in center and dilutes out towards edges.  Repeat on whole canvas with all colors, this technique also works to blend colors together.


Here is the completed galaxy.  I concentrated most of the color in texture areas and blended out to non-texture areas.


Add white highlights.


Finish galaxy with splattered white paint, and rub on some white gold wax on stars.


Position full moon in center of galaxy then paint a halo around with white gesso.  Again i painted on then spray with to dilute and fade out edges.  Repeat for all stages of moon.

Finish with sisal underneath moons, insert hitch posts into canvas and wrap with wire.


I think the star bundles are my favorite spots.


When i am working on mixed media there are so many layers of paint and texture I always think i am covering up everything but those layers is what creates all the depth and realism.


Painted in swirl motion, then added some random wire onto hitch post.


The alchemy metallique paint looks amazing on black.

Wednesday 14 March 2018

How to Make a Steampunk Balloon

So last week I showed you how i painted the background canvas for this piece
Now for how i created the balloon.


I started with a 8" styrofoam ball cut in half.   Now here is a random fact about me- i took one year of fashion design and learned how to make clothing patterns.  So to make the pattern I used a scrap piece of paper and pinned onto ball.  Start at the center and pin toward top,  pin so paper lays flat.  You will get a triangle shape, I wish i had taken a picture.


Distress and ink edges, pin along edges.  I used flat head pins, looks like nails.


Pin on the top piece.
Cover entire ball.  The distress edges are great for hiding imperfections in cutting and construction.


I made the airship with chipboard, first i drew out a pattern on scrap paper.  I used pictures of airships I found online for inspiration.


I didn't want the airship to be flat so i made chipboard pieces for the bottom and deck in a curved shape.


Here is how the airship looks once glued together, I got carried away the hot glue.  The curve can be too sharp or the chipboard will crack and break.


How it looks flat.  Cover with pattern paper.


Glue on airship and balloon, now decorate.  I actually prefer the construction part- figure out the how to.
Hope this answers your lingering questions.


Friday 9 March 2018

Lines are Everywhere

This month at scrapki-wyzwaniowo is all about lines
Lines! They are everywhere. Either created by your embellishments or the ones you draw they are an essential part of every composition. This Match we want to bring them into the spotlight in your projects. So the theme of this Challenge is LINES. Be inspired by them and create any kind of project that you come up with and share it with us in this months Challenge.

I started with a 18"x24" canvas, I use a palette knife to smear on some modeling paste to create some texture.  Next start by blocking in my colors using acrylic paints, this is my base coat.  Acrylic paint dries quick so the next coats i work in blending and defining graphic.


Here is where i start blending and defining clouds.  I tend to use the same paint brushes for entire background and don't wash in between.  Instead of washing I wipe on paper towel, and baby wipes I find this helps with blending colors.


Here is the final sky.


The final steps are splatter with white and gold paint for stars.  Next dry brush with brown paint, this technique will highlight the texture created by modeling paste.  Around the outer edges rub on white gold metallic wax- these last two steps give the canvas a grunge/ antique look.


And here we are ta-da!  I love airships and I love how this one turned out.  Lots of lines here, lines on the balloon from the pattern paper, and lines from twine connecting balloon to airship.  


So it is a 3-D airship, I cut a 8" styrofoam in half covered in 7 dots studio northern lights paper.  To make swags, wet paper with a spray bottle, then shape and allow to dry completely.  Once dry the paper will hold the shape.  I made the airship with chipboard, then covered with pattern paper.


Chipboard cogs, flourishes, and collage pieces were embossed with gold and marine stampendous embossing enamel then used to decorate balloon.
I like how the strings aren't attached to the canvas at all.


Another accent is hanging chain from paper swags.  The top is stacked cogs cut in half, one half on top and one on bottom of balloon.  This has a double purpose- hides construction, and really finishes balloon.


The following chipboard pieces were used on balloon, and available on my etsy store Boozybear.

Cogs $5.95


Alexander Flourish $3.95


Daylight Savings Time $4.50

Sunday 4 March 2018

Urban Skyline

So a couple things were my inspiration for this projects
1. Moodboard from Mixed Media Place, love those teals/greens and the sunlight.


2. This art journal page created by Aga Baraniak.com  she also has a video tutorial


And my take, I have been trying to figure what was bothering me about this page but looking at Aga's i have it figured out my skyline is too big.  I will need to try again.

I really wanted to incorporate telephone poles- more of an urban skyline.


I used thin wire to string pole to pole, love how this turned out.  I really love the poles definitely trying this again with a smaller skyline I think it will look way better.  (great english eh?)


The background was created with dictionary paper on water color paper and covered with clear gesso.  I used Lindy's sprays, water and a paintbrush for create the background sky.


Used light modeling paste and skyline stencil to create the city buildings.  Painted with Lindy's and Dylusions sprays, I used a paint brush.
Around the star i painted a little gesso to give them a halo affect like they were glowing.

I painted the poles with black water color paints then highlighted with white water color.

I have created some skyline stencils available for purchase on my etsy store  Boozybear

Toronto Skyline 10" x12" stencil $10.50


Vancouver skyline 10" x 12" stencil $10.50


Skyline 10" x 12" stencil $10.50