Today I finished
Altered Art Project for 7 Dots Studio. It is on an old Hardy Boys hardcover book, I opened the book and used gel medium to hold the book open. I forgot to take pics as i worked so no step by step but i am so happy with how this turned out i think i see a future class.
Here is the inspiration circle. I have to say
7 Dots is my favorite manufacturer for paper, plus all those lovely die cuts and phase titles.
This is a picture of my grandma and her oldest four children, my dad is the shorter boy in suspenders the one making a face. My dad always makes a face in photos or giving the finger to the camera lol.
As usual everything starts with the background paint pages with white gesso then sprinkled on some burnt umber primary elements, spray with water move the color around with a heat gun. Next glued on some texture chipboard and smeared on some stucco medium. Paint with alchemy butterfly spells sparks acrylic paint, while it still slightly damp sprinkle on primary elements burnt umber spray with water, again move color around with heat gun. I did this on several spots on background.
I have finished the above steps i thought it was to dark so I used my finger to smear white acrylic paint around texture areas, then splattered with white paint. The final effect is very midnight sky.
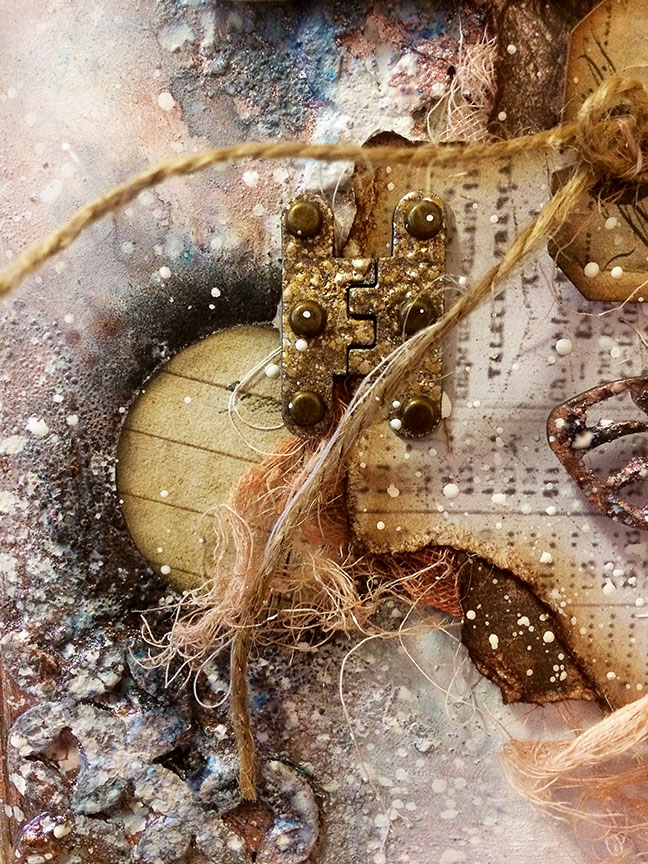
Used
chipboard hinges embossed with stampendous embossing enamel.
Add paper layers I used Writer's block, ripped edges and ink with vintage photo and ground espresso distress ink. Around layers and on background add some die cuts that come with the paper pack. I like to highlight the circles with black charcoal smear away harsh edges. The charcoal looks fantastic smeared on background texture. Here is used
locket chipboard to frame the photos painted with alchemy paints then sanded edges and inked gives it a more rustic finish.
Also in between the layers is colored cheese cloth, colored with Alchemy paint. I pull at the edges to really fray edges creates lots and lots of texture.
Here I used
bumble bee chipboard, first smeared with stucco medium then painted like background texture. Layer with more die cut elements from paper pack. Layer with cardboard, thread, die cuts, and lightbulb embellishment.
For the hanging dome I made a bracket with twisted wire, inside is a mini spool of thread with a flower inside. Now I never use flowers it started because I am surrounded by boys, husband, child and dogs. Flowers create tons of texture and are a great focal point but now it has become my thing to create texture without flowers. Sometimes I have a stubborn streak, I really want a mini bumble bee but I live in Cold Lake not a ton of craft stores so I made due.
Love how the hanging dome turned out.
As always my favorite spot where all my favorite things, cheesecloth, hanging dome, hinges, background texture, paper edges and title.
This was fun and actually came together super quick once you minus the time for sleep, dinner, driving Alex to meet Opa you know life. Plus I had an afternoon nap.
Also love this part again that background texture and coloring but I love the big circle paper panel and how the charcoal looks around.
I used the following chipboard pieces in project, they are available on my etsy store
BoozyBear.
Locket
Bumble Bees
Hinges