home

Monday, 30 March 2015

GEAR IT UP!- SanDee & Amelie's Steampunk Challenges


Here is the final layout, i spent the weekend at a crop here in town (Cold Lake) and i played with prima color blooms, transparent embossing paste, ranger color wash, chipboard and image transfer.

This page started as a antique white sheet of 12x12 cardstock.  I added some image transfer from the new fabulous paperlines from Marion Smith Designs- time keeper. Those would be the butterfiles, and paper in top and bottom corners.

I used a stencil with transparent embossing paste. i glued on some steampunk chipboard pieces i designed and have cut. Next i sprayed with a combination of color bloom tea stain, and teal color wash.  The color sinks into the chipboard as well and becomes part of the background.  Sanded around the outer edges and inked with vintage photo distress ink.


everything covered by the embossing paste remains it's true color.  The bubbles have that all there but not too much there effect.
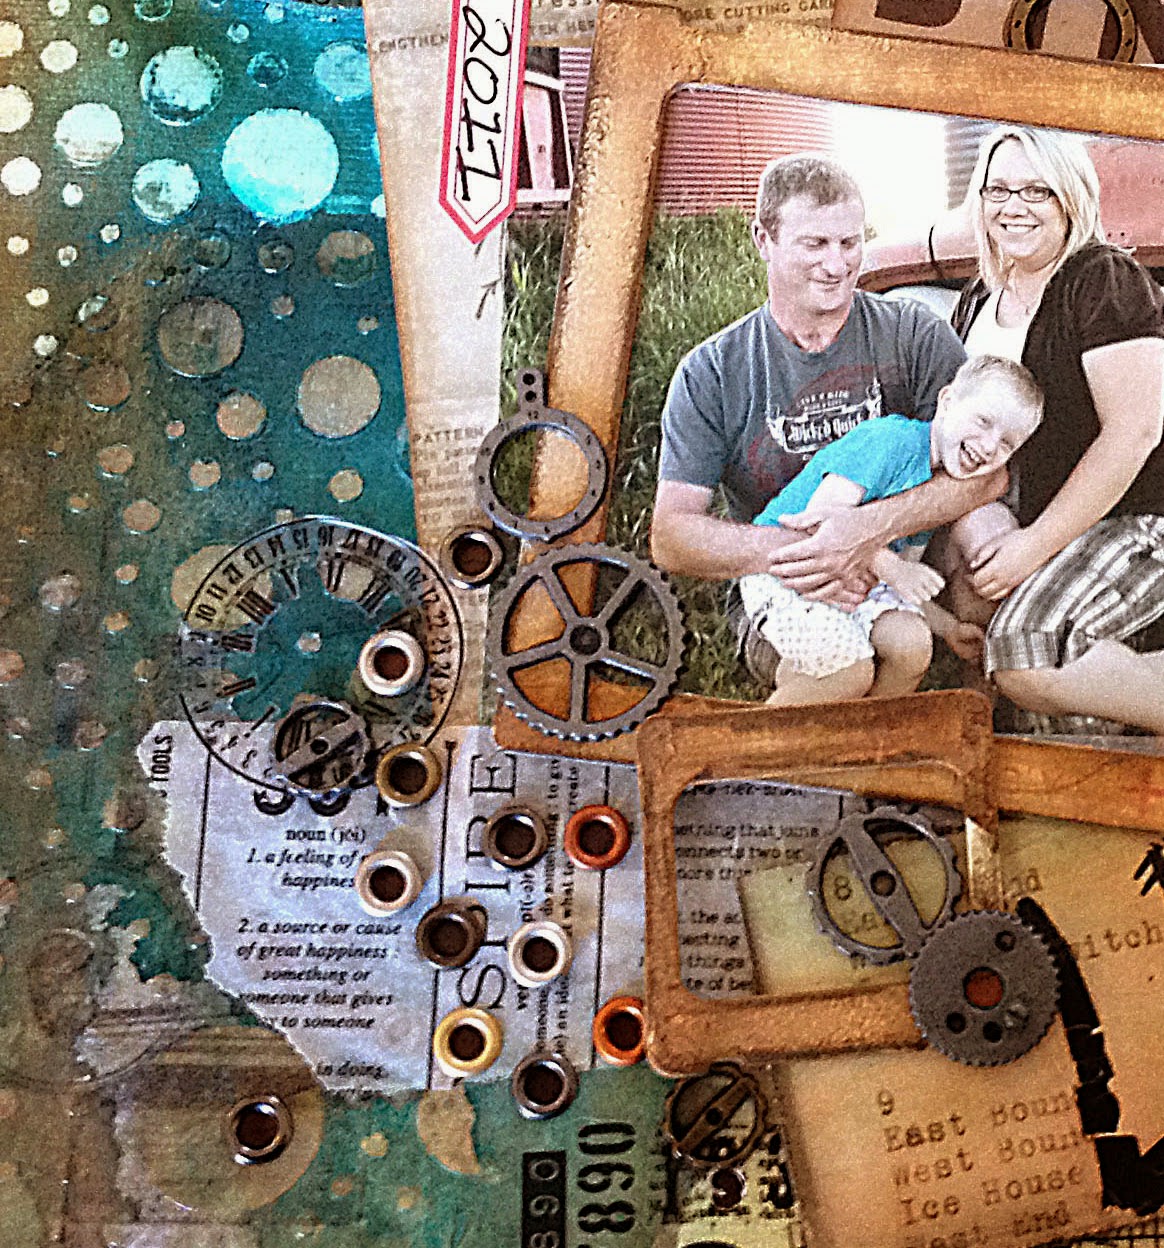
I love eyelets, so i randomly punch holes and add eyelets, kept the eyelets in clusters surrounding the photo.


Gear and eyelet clusters framing the photos.

Enjoy!

Wednesday, 25 February 2015

Mixed Media canvas

I tried my hand at mixed media canvas, i like but i don't think i am ready to give up 12x12 pages and creating funky albums for mixed media and art journaling.  It was a great change of pace.
The reveal:
 lots of going on...


created lots of texture with modeling paste, stencils, and the tacky mat for inside the cupboards.  Add some paint and sprays


more paint and spray then some blending
once you add the paint all the textures really becomes more pronounced.


this is my favorite part, i added the eye chart stencil with clear embossing paste.  It goes on white and dries clear for the final effect of there but not there.


how cool is that effect.


lots and lots of metal.  I love metal.  My favorite metal pieces are clock parts from prima marketing. But it looks like they don't make them anymore. OMG!!!


close up of metals, lots of metals.


Thursday, 12 February 2015

Vintage Bikes- Sketchabilities #132

Another creation from the weekend using a sketch from sketchabilities #132


Here is my take...I started by using my edge punch then inked around edges.  I used a piece of pattern paper underneath.
I created the splatters with dylusions and lindy magicals.  At first i didn't have the splatter but then it was way to clean, i needed a little mess. Oh i flipped the sketch kind of just the bottom.


the close ups
I cut out paper embellishments then had a gold bicycle rub on that was a perfect fit.  chipboard pieces are chicken wire and hexagons.  I covered the hexagons with pattern paper and sprayed with lindy's then inked the sides.  I used tim holtz filmstrip and buckle as accent.


Used a tim holtz rub on as my title, it was perfect for the picture of bikes.  I took the picture at my aunt and uncle's farm- how much more vintage can they be.


One of most favorite things to do is random rubons!!

ENJOY!

Monday, 9 February 2015

Scrapbook Challenge

I spent the weekend at a scrapbook retreat in Edmonton and worked on a few challenges.  The first one was at Scrapbook Challenge, sketch below

 and here is my take:
I love everything about this layout, it was one of those moments in scrapbooking where everything just works.  I used paper that i have had for 2-3 years and the page took off.  I used the paper embellishments and fuzzy cut them for page accents.  Next my go to embellishments metal and chipboard.

I created the background with a stencil and modelling paste, then i sprayed with lindy's powder mixed with water.  Once it was dry i inked with vintage photo distress ink.  Then layer, layer, layer.  I love layering!!!


Next the close ups!!
I love this page embellishment
CAUTION Poison
Caution this person is so cute that you may need antidote
Anidote- sunglasses (to block their cute face.), ear plugs (to block out their curious laughter), 3 sweatshirts (so you don't feel their sweet hugs.)  Approach with caution.  Too cute.

this fits my niece perfectly, isn't she a beauty.

two of my favorite things- steampunk balloon, and brackets


clustered groupings of chipboard, metal and enamel dots.  Prima Marketing clock parts are FAB for clustering.  Alas i don't know if you can get them anymore- sucky.


i colored the chipboard with peacock feather distress paint, then sprayed with Lindy's glimmer.  Love the Lindy's products, if you haven't tried it is a scrapbook must.


Wednesday, 28 January 2015

Sketchabilities / White with 1

Challenge #131 from Sketchabilities the sketch is below
This challenge was a joint venture with White with 1, so create a layout based on the sketch and use 85% white on your page and the color of the month Placid Blue.


Here is my take- my scrapbooking buddies and I fought over my take on white since I said winter white, and antique white is still considered white. They argued that it was cream and so not white, but i said it is a shade of white.

Moving on i painted all the chipboard in either white or antique white as i like to say, sanded and inked with vintage photo distress ink.  I had to use ink i can't have an un- inked page; needed some contrast.


I used had a texture pack from my friend Wendy to create the background layers, sandpaper, gripper, place mat and shelf lining.
But my favorite part is the rubber bands!! I stretched them out to frame the picture and held in place with brads- another layup must metal of some sort.

Enjoy.

The chipboard i used is from Blue Fern Studios who I always design for.

Monday, 26 January 2015

Creative Weekend

I spent the weekend at a crop here in Cold Lake, and it was super productive.  I played with sprays, chipboard, stencils, molding paste, paint and more.  Here are some super fun tags

Chipboard, rub ons, dylusion spray, lindy embossing powder, prima mechanicals, butterfly stencil and distress paints.  This one i fought with and hated it til i added the rub ons then it all came together.
 I started with woodgrain stencil added studio calico huey mists in yellow and orange and with those colors it took on a halloween theme and i went with it. My favorite part was the purple gelatos around the outside edges- LOVE LOVE LOVE.  Another great add on is the chipboard cage light, one of my designs now available at Blue Fern Studios.  Little pat on back.
 This one was an experiment in finger painting.  First i applied the stencil with modeling paste then used spray to get the color in the leaves and poppies.  I liked that i got overspray in the other sections more of a messy look not paint by numbers.  I used acrylic paint and my fingers for coloring and shading.
Another one with my chipboard- again a little back pat.  I really like putting the chipboard modeling paste stencil then put gesso over the whole thing.  Then when i add color with spray and paint it colors the chipboard blends into the background adding another dimension.  Finished with adding embellishments and created more dimension!

Sunday, 18 January 2015

Steampunk House

Here is my newest which will be available at Treasured Memories in Edmonton, Alberta in February.  The kit includes a 3 Dimension chipboard house with a pull out album.  These was a super fun project and i hope you love it as much as i do.

I used Marion Smith Designs Nirvana Paperline and Prima Marketing Cartographer paper line on the outside to cover the steampunk house.  I created the house using chipboard it looks complicated but i broke it down into sections, porch, main house, balcony, and second floor then made each section and attached together.  The house can be viewed from front, and sides but the back is flat to go against a wall.

I created piping with large bendy straws and rolled cardstock covered with metal foil from Ranger.  Additional items are pulleys, corked domes, metal gears, wind up and door pulls.


Here is the view of the balcony with port holes, you can see the sections of the house and dimension.


The album pulls out from the right side, it is tucked into chimmey of the house.  It is a 3"x10" album used the remaining Nirvana, Cartographer for the inside.  But alas not enough paper so i also used 7 Gypsies Global, and Kaisercraft Miss Empire.


The inside has flips and flaps, and envelopes lots of places to add photos and journalling.


Once i have finished the instructions i will also post the instructions on my etsy site, then you too can create with your own paper choices.