home

Thursday 6 July 2023

Shambles Book Nook

Fun fact about me- when i was 20 i lived in Scotland as a nanny.  While i lived there i took a holiday in York stayed in this little cottage and toured around York for a few days.  It is old and beautiful, it has a street called "The Shambles" with preserved Medieval building AMAZING!  

Fun fact about Medieval building- Built on narrow streets, timber framed buildings with jettied floors that overhang the street.  These types of building caused fires to spread easier since sometimes houses across the street from each other would almost be touching at the top.

York Shambles


And my Take
I don't usually add scenic items but for this one i did- the laundry hanging from the upper windows, boxes, straw and twigs, and fruit.
I think it really brings the scene alive, i think i will do for all future booknook but finding items or making them small enough is a challenge.


I tried to capture the uneven construction of the medieval building but i really struggle making things uneven and dilapidated.  I like to make this precise and symmetrical.

I would really love to make a haunted house but i will need to force myself to not make it perfect, and to use darker colors.

Enjoy!


Saturday 5 November 2022

Mixed Media Christmas Cards

Created some new Christmas Cards using lots of mixed media materials- Primary Elements mica powder, Stampendous embossing powder and fragments, Art Ingredients glass glitter, sisal twine, sequins, burlap, glitter, metallic paint, and distress ink.

Lots of Texture
Lots of Layers
Lots of FUN!


Start by painting background (mixed media paper) with Primary Elements Mica powder mixed with water to make a runny paint.  Add some interest with splatter.
Stamp with texture stamp and embossing ink sprinkle with white embossing powder and heat set.
Distress the edges of card background and ink with distress vintage photo ink. Add embossing ink along edges, sprinkle on stampendous aged aqua embossing enamel, heat set.
Wrap twine around card background.
Wrap sisal into a bundle, staple onto background where twine crosses over.  Paint gel medium onto card around and on sisal, sprinkle on glass glitter and blue fragments.  Now you can add fuzzy cut images.


Lots of Texture
Lots of Layers
Lots of FUN!


Draw snowflakes on background with liquid Applique, once it dries heat with a heat gun and it will puff up like snow.  Distress edges, ink with vintage photo distress ink, also ink paper circles, and paper edges.  Fray burlap, glue everything on to background.
Sprinkle on Stampendous shabby white and orca embossing enamel, sprinkle micro beads on top of embossing enamel. If you heat from the bottom no need for embossing ink.
Add some metallic fragments and sequins.  Now add fuzzy cut images.


Saturday 1 October 2022

Christmas Card Kits

I have two upcoming Christmas Cards please Private Message me to pre-order via facebook page https://www.facebook.com/boozybearblogspot These kits will be shipping October 15, 2022.
Kit #1- Christmas Morning Coffee $70 includes shipping (Canada Only)
12, 4"x6" cards, includes Boozybear Chipboard, printed cutting images and sayings, pre cut pattern paper, card bases.
Kit #2- Blue Christmas Mixed Media Card Kit $85 includes shipping (Canada Only)
10 4"x8" mixed media cards, includes Boozybear chipboard, Lindy's magicals, stencil, crackle paste, mini pearls, pre cut pattern paper, card bases.
Order in multiples and receive a discount.
Buy 2- 15% discount
Buy 3- 25% discount
Buy 4- 30% discount

Kit#1
Chipboard window, with a snow scene then add crackle effects on top to create a crisp snowy morning.


Kit #1
Add images around window, especially the morning cup of coffee.  I used pop dots to add dimensions and levels.


Kit #3
Finish with a title.
Kit #2
Create background with stencil and crackle paste, add color with Lindy's magicals.

Kit #2
Added layers with pattern paper and tags.  


Kit #2
Add chipboard wreath with fuzzy cut image around.  Add chipboard saying and snowflakes.


Kit #2
Sprinkle with watered down white paint and add gold beads.


Sunday 10 July 2022

Industrial Grunge

 The creative juices have been flowing, designed some new chipboard and stencils for layouts and cards.  I ordered some paper from 13arts  some really fun papers!

Mr Handsome Paperpack


A few papers form Industrial Zone


HOW GREAT ARE THESE!!!!
Retrospective images.


And these might be the best thing every... 12x12 vellum sheet of images


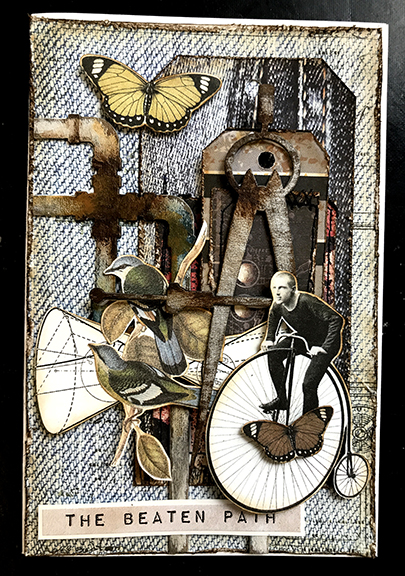
I made 6- 12x12 layouts and this is by far my favorite one.

I used Lindy's magicals for background colors, some gold embossing enamel and rusty chipboard.


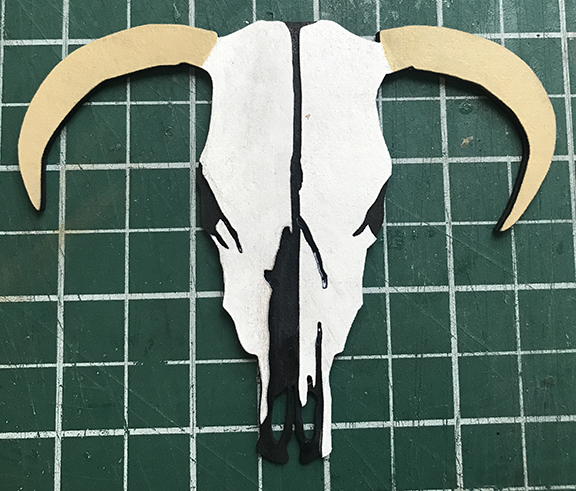
And now the close ups, my favorite part the rusty pipes.

I started by painting them white, then gave a light sanding and inked with Vintage Photo distress ink.  The ink settles into the sanded portion and wipes of the painted areas.

Next added some rusty colors, dark reddish brown, orange-ish brown, and a little teal color for patina.  
I love the final look, I also the negative space created by the pipes.


The vellum in action!
I used gel medium to glue onto the page.


My next favorite layout, I also love this picture.  How great is this piece of paper!! I added the red with Lindy's magicals.

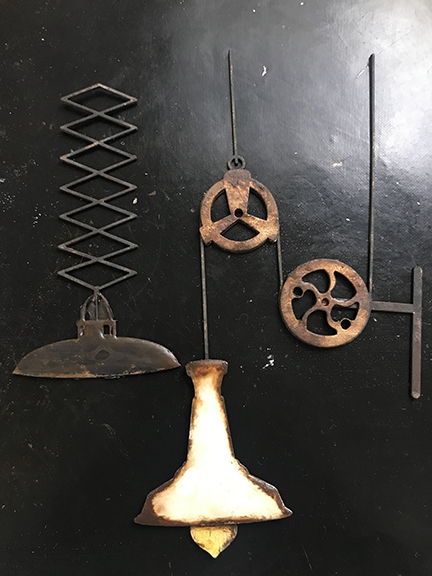
Love this chipboard piece!

For these light I painted black, then lightly sanded and inked.  Added the rusty finish with reddish brown, orange-ish brown paints then covered with Mod Podge Dimensional Magic.  The Dimensional magic makes the light look enamel, like the real ones.


Just look at that SMILE and those rusty pipes.

I made the tags with pattern papers, and added stitching around, sewing on any page is always fun!


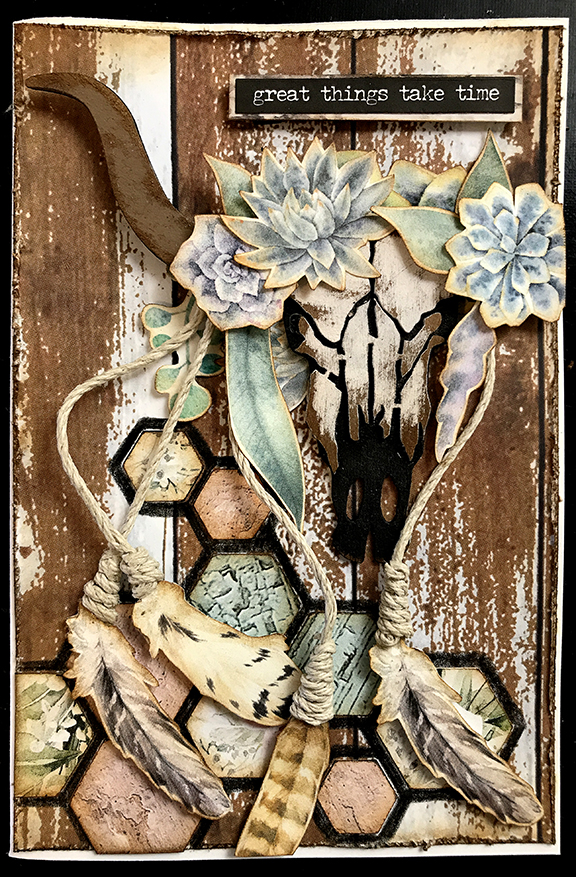
The retrospective paper and those funky chipboard designs makes some really great steampunk cards!


Some new funky chipboard light designs.


Vintage drafting tools.


Funky rusty pipes.


Simple gear motor systems.

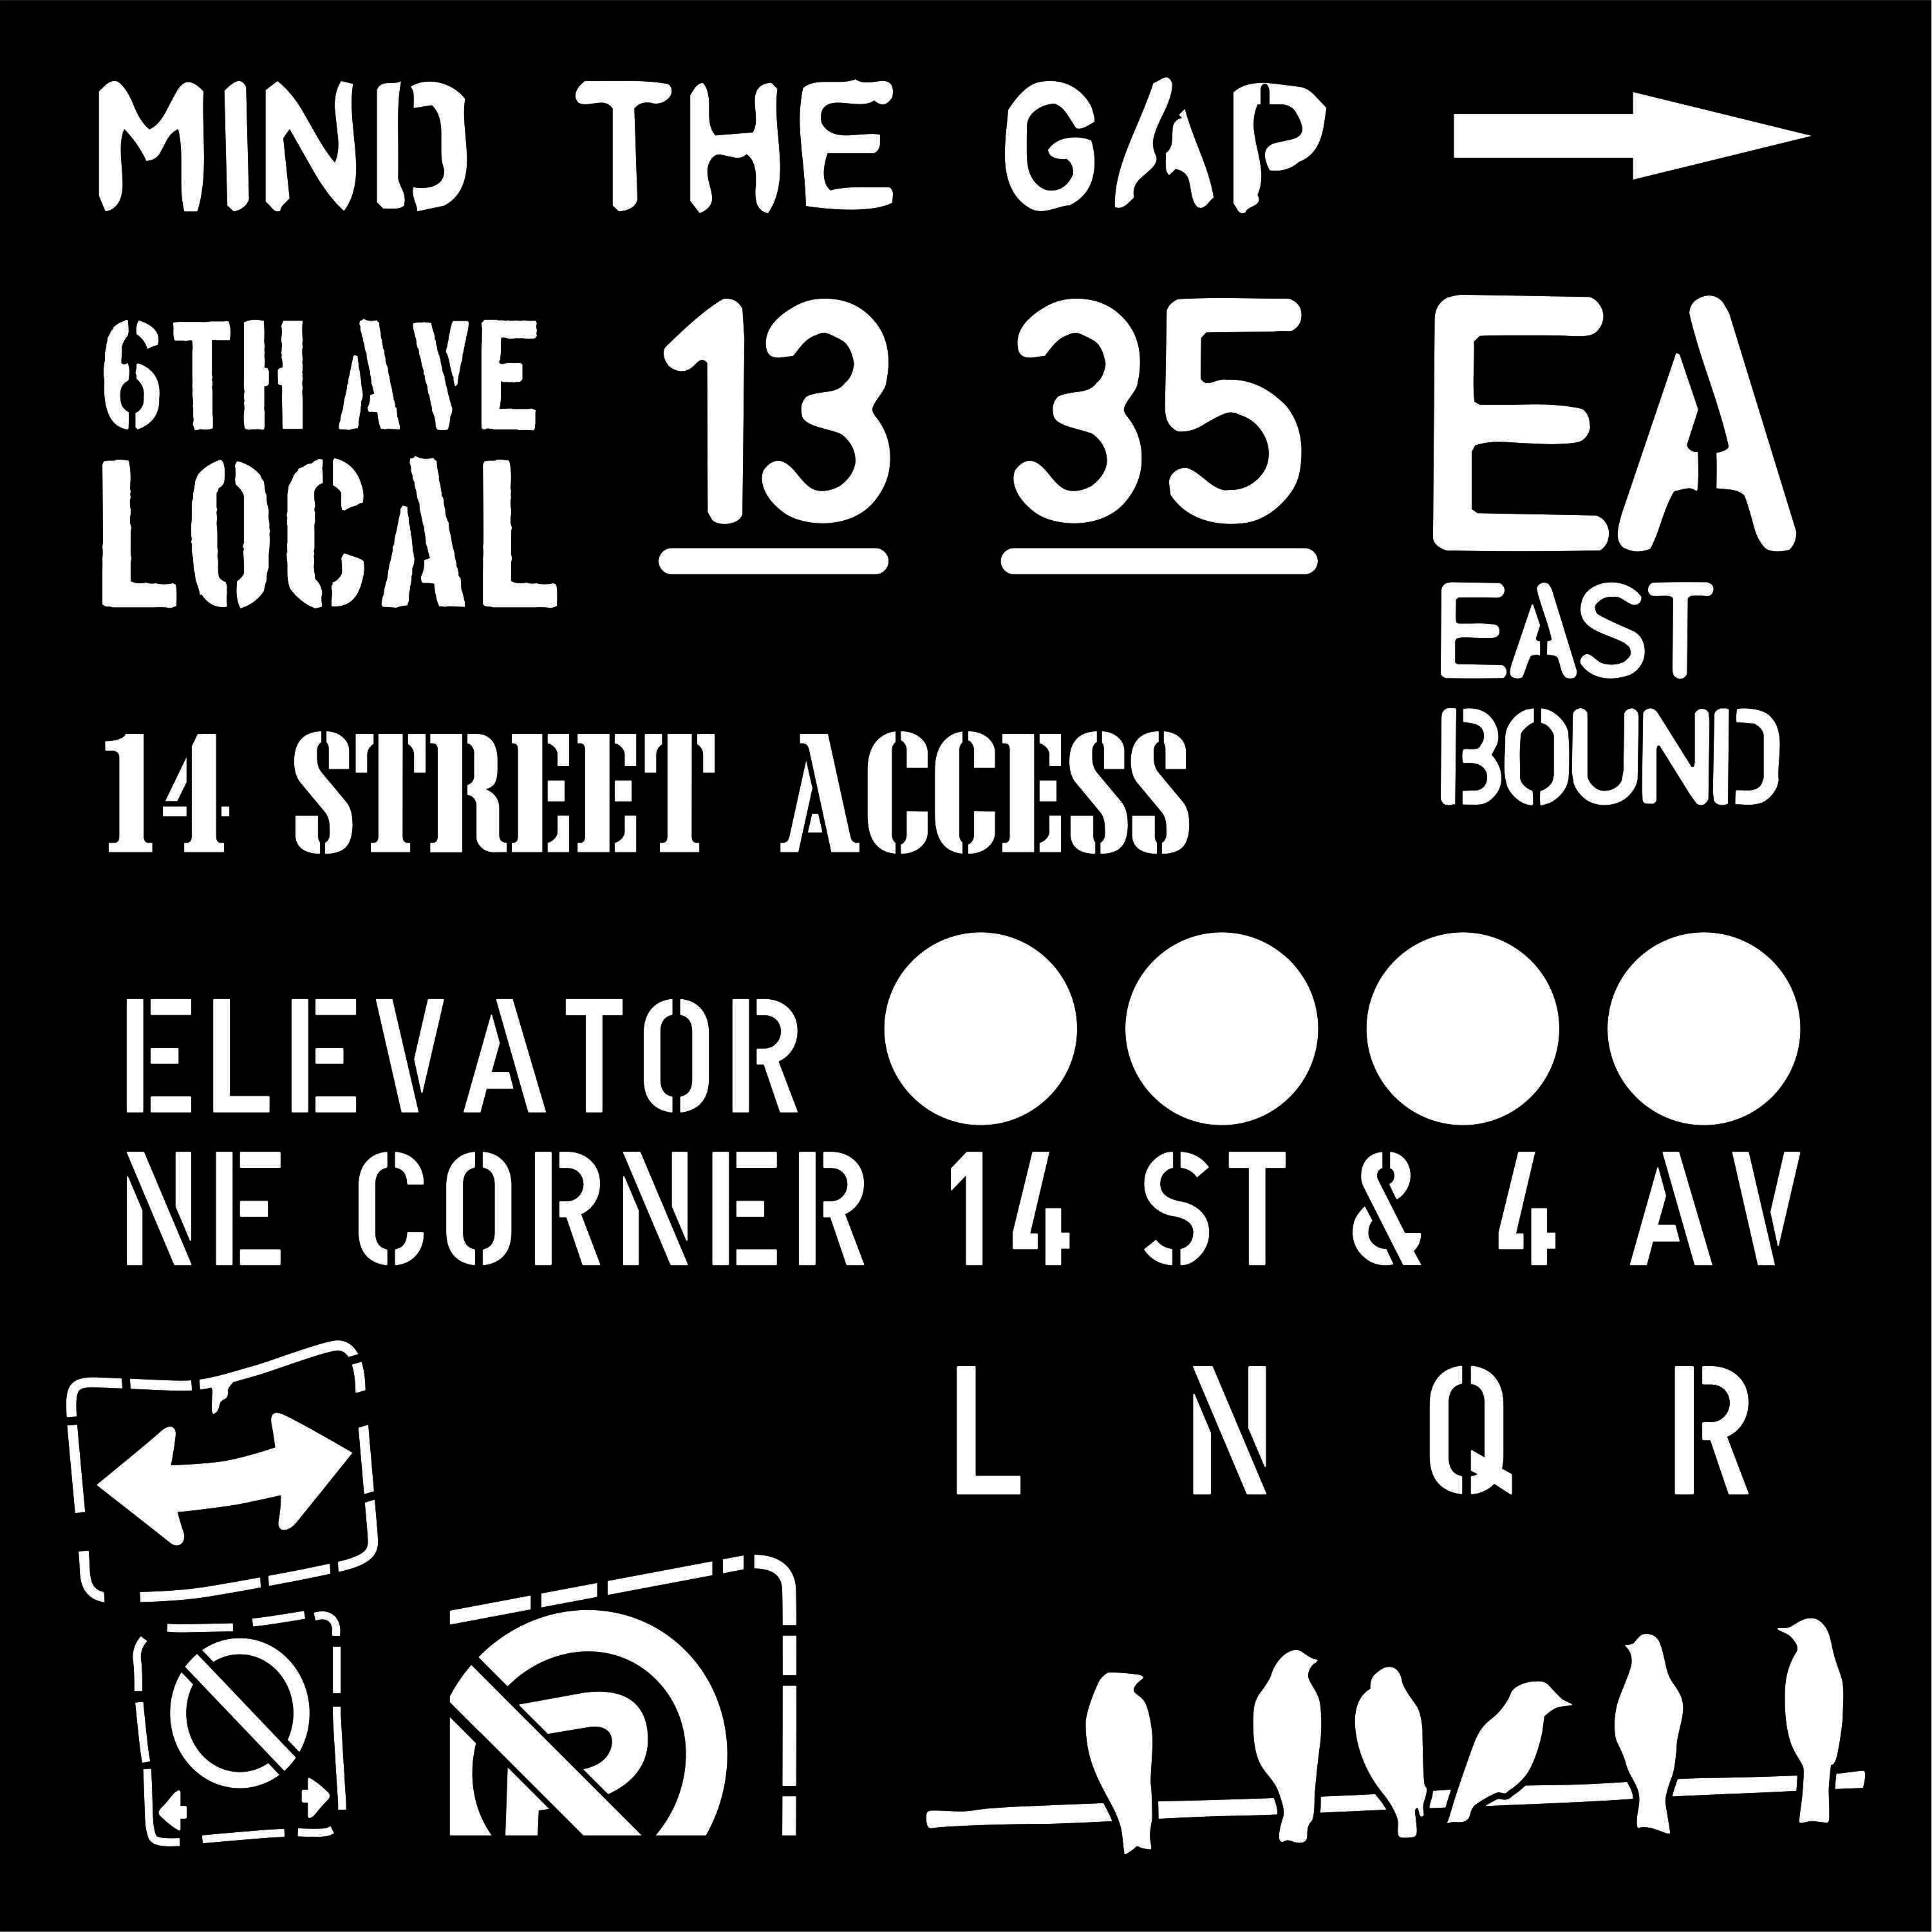
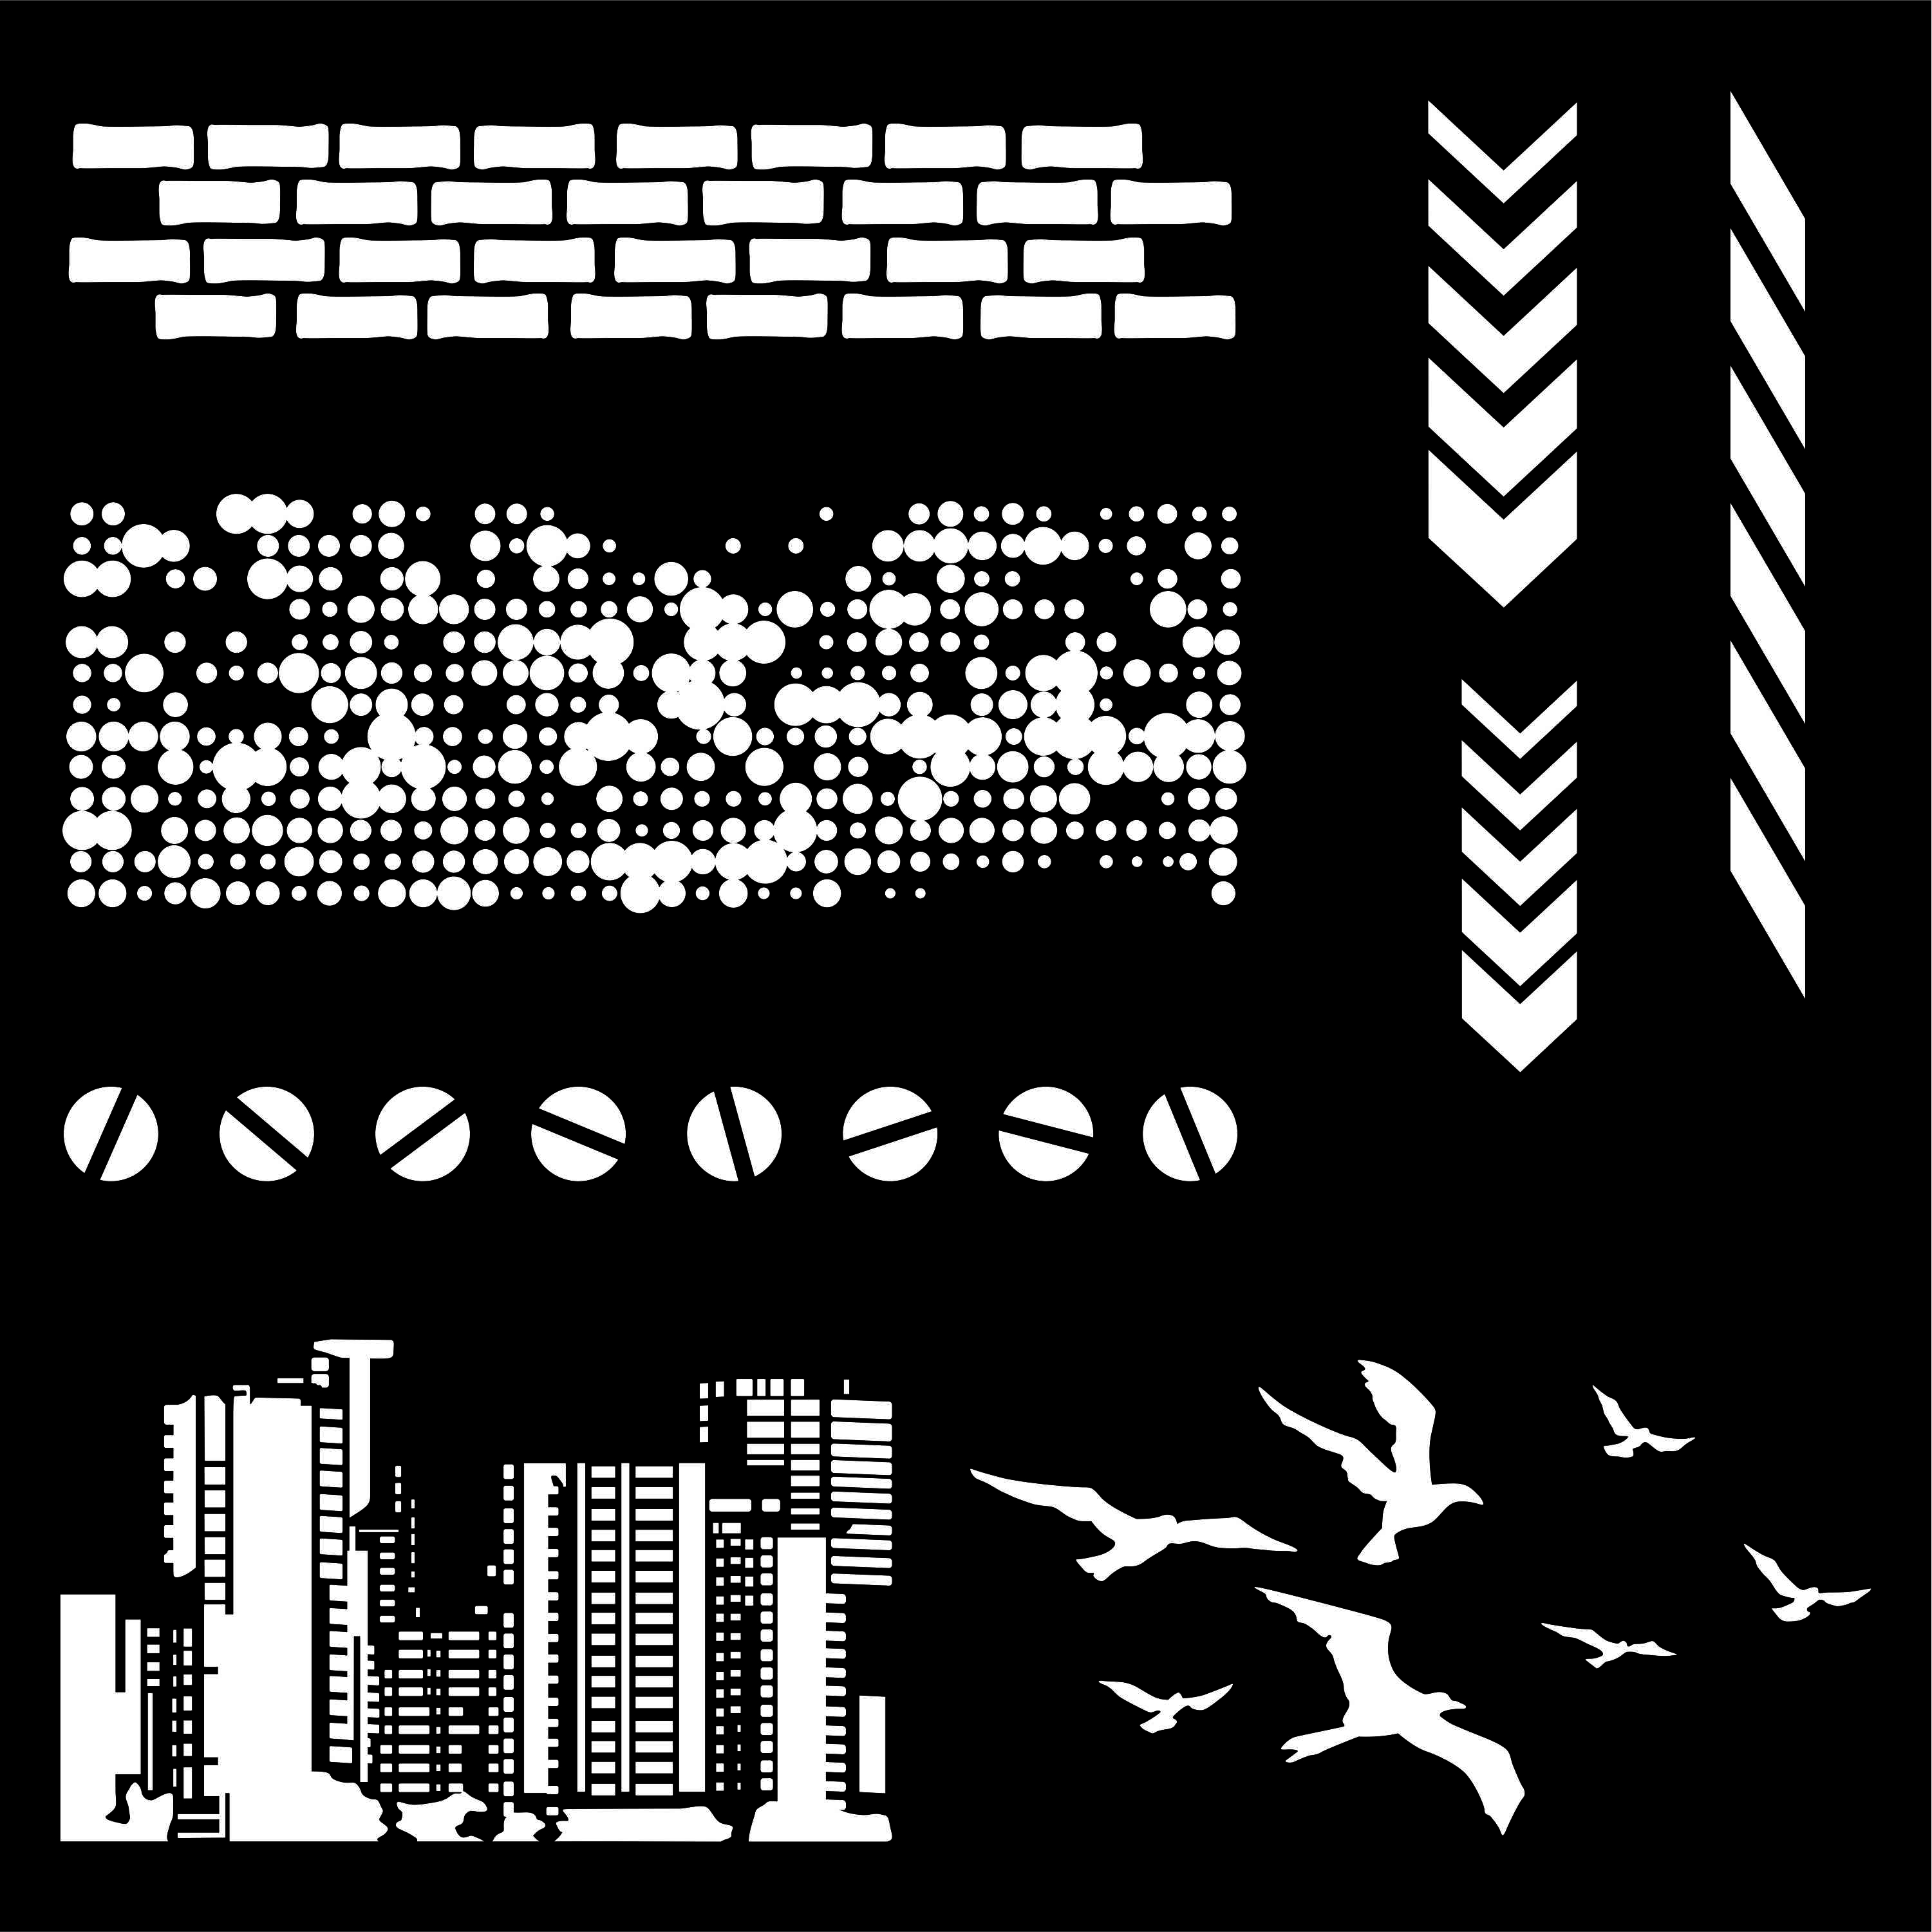
Three new stencils all with a industrial grunge theme.


That cityscape was a couple hours worth of computer work all on its own.


I got a thing for street lights and power poles.

Stencils and chipboard now up for sale in Etsy Store.

Wednesday 18 May 2022

Boho Cards

I created some new cards with a Boho theme.  I designed some new chipboard layered skulls then decorated with paper succulents.  I used my silhouette to cut very sizes of hexagons glued them on background then drew around with a black pencil crayon.


I started with the bottom layer, and painted it black.


Paint the horns a brown tone, and the face white then glue onto the black base layer.


Next sand and ink, the ink will settle into the sanded portions and wipe off the paint.  Now looks old and worn.  I wrapped around the horn with leather cord.


Layer on paper succulents.  Some are glued on the back and some up pop dots.


Some of the skulls have macrame off the horn.  I used natural twine, knots and combed out the twine.